Pages

Showing posts with label one dish meal. Show all posts

Tuesday 30 September 2014

Long Bean Pumpkin Rice (菜豆金瓜饭)


The hub is a Hokkien and his mum used to cook them long bean rice or otherwise known as Cai Dao Peng. She has not done so for quite a while and my sister-in-law is always asking when she can cook this childhood dish again.

I had some long beans left after I fried some long bean with minced pork the other day (my childhood dish!) as requested by the hub. So decided to let the hub reminisce his childhood dish, with a twist of course! I also wanted my children to try more of our childhood dishes so that the dishes will not be forgotten and can be pass down to their children in future.


Simple rice dish with long beans, I added sliced Taiwan sausages, pumpkin and chicken to make it more flavourful. In the end, the hub says the smell reminds him of Lotus Leaf Rice....sigh... but he did say he like it and he took double portions that meal!

Here's the recipe...


Long Bean Pumpkin Rice (Serves 5 - 6)

180g pumpkin, diced
25g dried shrimp, washed and soaked
5g dried baby scallops, washed, soaked and tear into small pieces
5 strands of long beans, washed and cut into small pieces
4 cloves of garlic, minced
4 shallots, sliced
1 toe-sized ginger, peeled and minced
1 boneless chicken thigh, cut into bite-sized pieces
2 cups of rice, washed
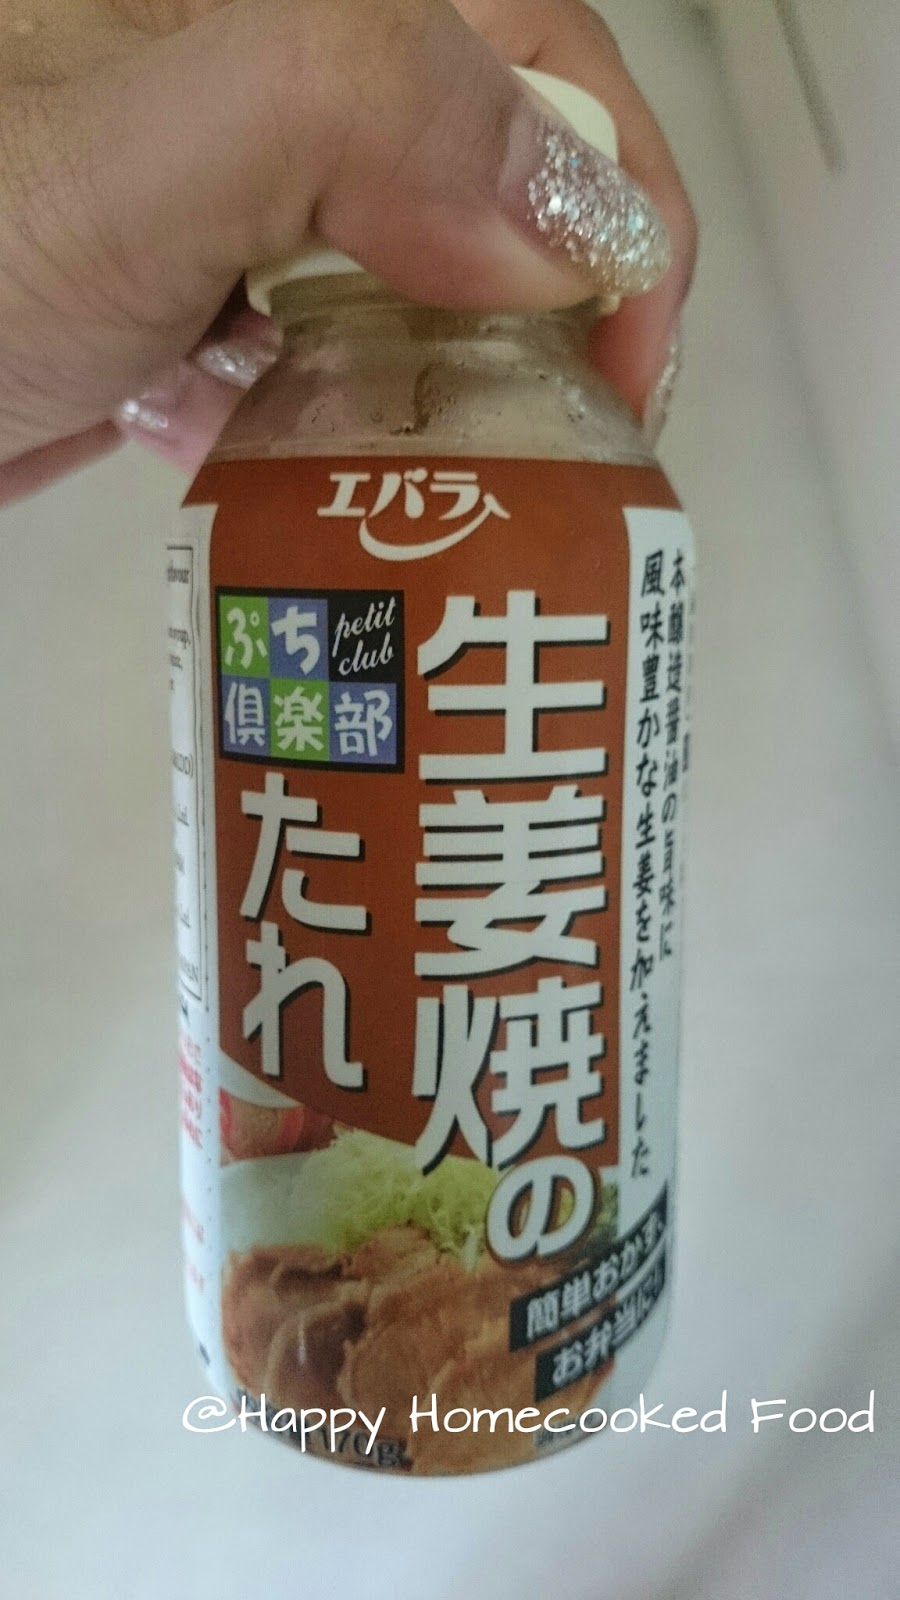
1 - 2 tbsp dark soy sauce
2 tbsp Hua Diao wine
1/2 tbsp light soy sauce
A few dashes of pepper
water

Spring onion for garnishing (Optional)


Directions

In a heated oiled wok, add in 1/3 of the garlic and fry until fragrant. Add in the long beans and stir-fry for a min. No need to fry the long beans until cooked. Dish out and set aside.


Add a little oil and fry the taiwan sauages until fragrant and slightly browned.


Shift it to one side and add in the ginger, garlic and shallot and fry until fragrant.


Add in the dried shrimp and dried scallops and fry for a min for it to be fragrant. Mix with the Taiwan sausages.

Add in the pumpkin, rice and chicken. Stir to combine.


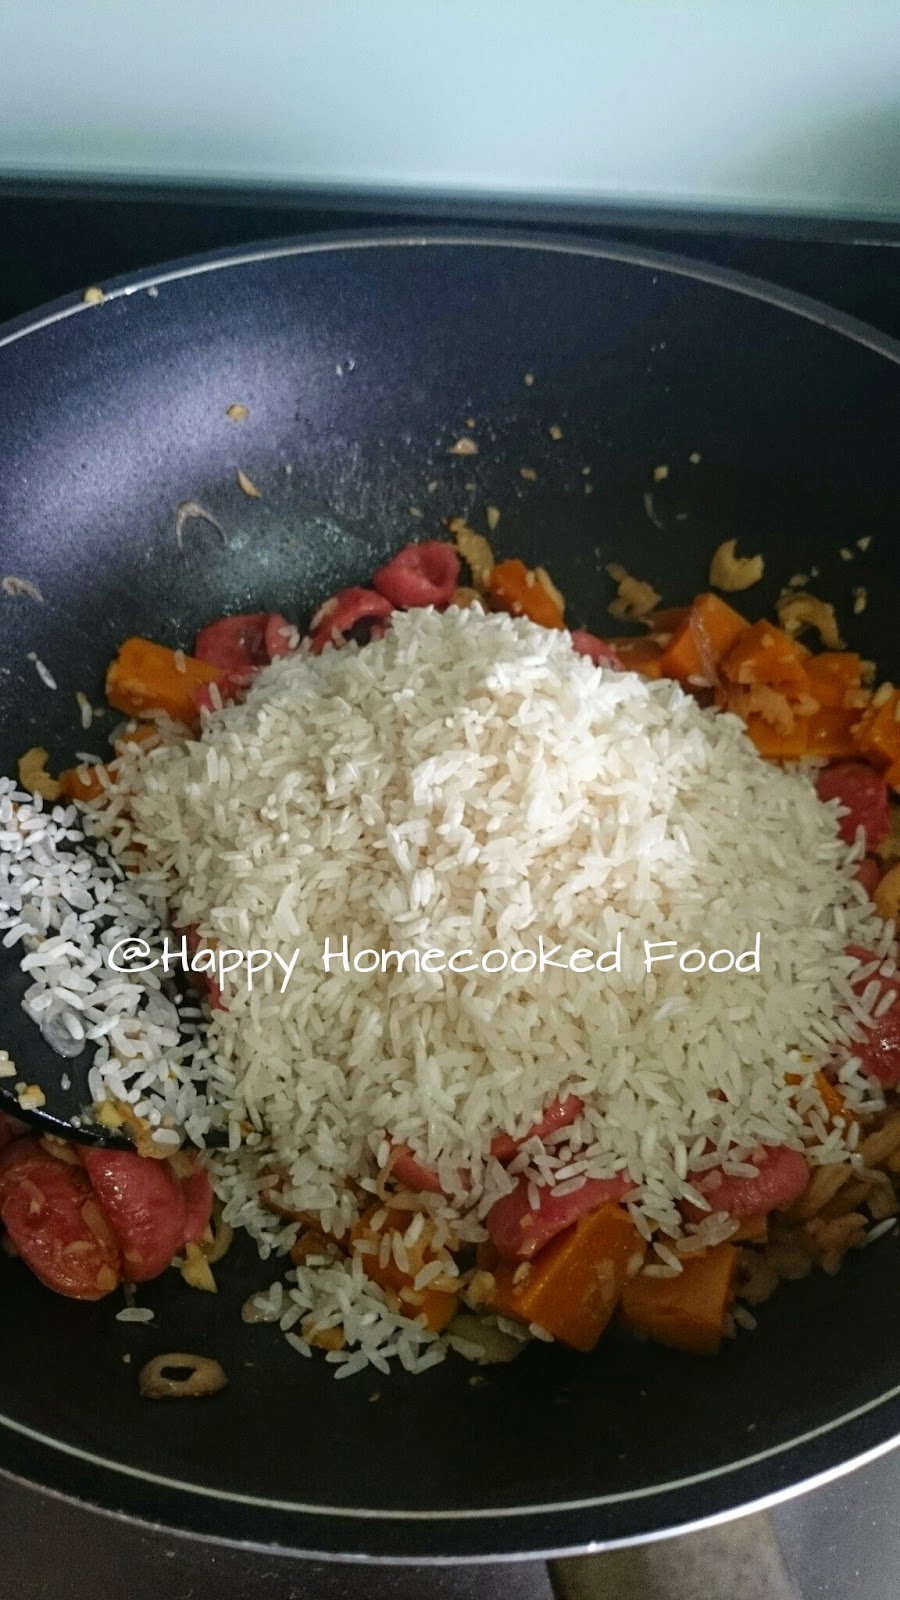
Add the dark and light soy sauce, pepper and wine and mix to combine well.


Dish up into a rice pot and add water to just cover the rice. do not add too much water or the rice will be very wet when done. (I did mine slightly too wet, would be even nicer if it was a little drier) Put the rice cooker to cook the rice.


When the rice is almost done (At this time, steam has begin to come out of the rice cooker), add in the long beans and continue to let the rice cook.


When done, dish out and garnish with spring onion. (optional)


Enjoy!


Hope you will like this dish as much as my family. And if you are a Hokkien, hope it reminds you of the wonderful childhood dishes that your mother or grandmother had cooked for you.


Wednesday 17 September 2014

Shogayaki (Pork Slices in Ginger Sauce)


My children always prefer to chicken over the red meats, but I wanted them to "open up" to other food options so I decided to try make this dish for them. My children always loved Japanese food and this is one of the common Japanese dishes you can see in restaurants or Japanese stalls in food courts.

As the hub likes onions, I added lots of onions to it. For this round, I'm using a store-bought sauce for the dish which I bought from Daiso. Cheap and nice. One of my most preferred store-bought sauce for meats.


I added extra grated ginger to enhance the taste but this is entirely optional and you can leave the grated ginger out if you don't want so much heat in the dish.

In addition, I did not have enough time to slice the meat so I bought pre-sliced pork meat.


This dish of sweet and tender pork slices goes perfectly well with a bowl of steaming hot rice and is wonderful to warm up the body on a cool evening.

Here's the recipe...


Shogayaki (Pork Slices in Ginger Sauce) (Serves 4 - 5)

300g sliced pork belly Sukiyaki meat
1 large yellow onion, sliced
1 clove garlic, minced
1 tsp grated ginger (any juice that comes out when grated also add in)
7 tbsp ginger sauce (bought from Daiso)


Directions

Marinate the meat with 1 tbsp of the ginger sauce for about 10 mins. Meanwhile

In a heated frying pan, fry the garlic and onion until fragrant.


Add in the pork and grated ginger. Stir-fry for a while until meat is almost cooked. As meat is very thinly sliced, do take note not to overcook it.


Add in the remaining ginger sauce and stir to mix well. Lower the fire to medium low and let meat simmer until fully cooked and has absorb the flavour from the sauce. If sauce is not enough, add a little hot water, 1 tablespoon at a time until desired amount of sauce. Do not add too much as it will dilute the flavour.

Best served hot with rice.


My children surprisingly loved the dish and my elder son, who detest pork, ask me to cook this dish again. A simple and fast dish that the whole family will love!


Happy cooking!


Thursday 3 July 2014

Cola Braised Korean Chicken


When Betty J Woo of Singapore Home Cooks Facebook Group recommended this recipe on Facebook in May and I was amazed that cola could be an ingredient to braise chicken! I immediately put in on my to-do list and promised myself I had to try it as soon as possible. But, I was soon plagued with sickness and with the then June holidays came. It slipped out of my mind.

So when Zoe of Bake for Happy Kids invited me to join the Little Thumbs Up event (Potato), I was quite stumped on what should I submit as this is my first time participating in this type of events. I looked through my recipes and I suddenly remembered this dish. And I decided....this shall be my dish!

It was actually cooked on a very tight schedule, as I had classes after sending my kids to the in-laws in the late afternoon. So I definitely had to cook this before I left home. This Cola Braised Korean Chicken by Beyond Kimchee was so easy to prepare that I was able to complete the dish before I had to bring the kids over. I had made some minor adjustment to the ingredients of the recipe by adding black fungus and changing the rice wine for hua diao wine. I also changed a little of the process of cooking. The original recipe calls for blanching of the chicken before braising but I prefer browning my chickens to have that rustic taste. I also add the vegetables into the braising sauce before the chicken as I used chicken wings this round and that requires lesser cooking time.

Verdict at dinner time was fantastic. My elder son, who is not so into braised chicken, had 6 - 7 chicken wings and was still begging for more. Everyone loves the dish! Both the black fungus and the sweet potato noodles soak up all the flavors of the sauce and they just taste so heavenly. The slurping of the flavorful noodles is something you would not want to miss.

Adding of the dried chilli definitely brings up the oomph in this dish. For me, I just added 2 for the benefit of my younger kid. If you are the type that likes a little extra spiciness, feel free to add more dried chilli.


Here's the recipe...


Cola Braised Korean Chicken (Serves 4 - 6)
Original recipe from Beyond Kimchee

1 kg chicken thighs, bone-in and cleaned. (I used chicken wings this round)
100g Korean sweet potato noodles
450g small whole potato (you can use large potato if you like. Cut into large chunks)
2 carrots, cut into 1 1/2" chunks
1 large onion, halved and quartered then separate the pieces
5g dried black fungus, washed and soaked. (you can also use fresh fungus as well)
4 - 7 dried chillies or fresh chillies without the stem
500ml cola ( I used slightly more, around 700ml)
2 tbsp soy sauce (I used good and thick dark soy sauce)
2 tbsp rice wine (I used Shaoxing wine)
1 tbsp minced garlic
1 tsp fresh minced ginger


Directions

Soak the Korean noodles in warm water to soften it. Set aside to be used later.


In a medium-sized pan, brown the chicken wings on both sides. Remove from pan and set aside.


In a braising pot, combine the coke, soy sauce, garlic and ginger together.


Add the potatoes, carrots and black fungus. Bring to boil.


When come to boil, return the chicken wings to the pot. Add onions and stir to coat evenly.


Cover with a lid and simmer over medium-low heat for 20 mins. By this time, the vegetables should already be soft.


Raise heat to medium or medium-high, add the noodles and continue to simmer for another 5 - 7 mins, stirring occasionally to prevent sticking to the pot.


 When sauce is reduced by half and vegetables become tender, turn off heat and allow the stew to rest for a few mins before serving.


A pretty easy and fool-proof recipe that warms the body especially on a chilly day. Though it is good on its own as a one-pot dish as it has the sweet potato noodles (known as dangmyeon) inside, pairing it up with rice is equally nice.


Hope you like it, I definitely did! :)

This post is linked to the event, Little Thumbs Up organised by Doreen from my little favourite DIY and Zoe from Bake for Happy Kids, hosted by Jasline from Foodie Baker at this post.


Photobucket

Tuesday 20 May 2014

Fried Koko Noodles


My elder son has NAFTA test today and had to take a light lunch. So I decided to cook some noodles for all since the little one has been asking non-stop for noodles. This is a dish which I have not cooked for a long time. It is a very easy dish using koko noodles (可口面) or better known as maggie mee. Ingredients are easy as well, the ones I used are generally ingredients that my children like.

You can also use vegetables like bean sprout, long beans and meat like minced pork, ham, diced chicken etc. The options are endless. So basically this is a very versatile dish, ever-ready to adapt to your palate and yet still taste fantastic!


A wonderful dish to whip up on a busy day and yet still wanting to do some cooking or a simple lunch for the family.

Here's the recipe...


Fried Koko Noodles(Serves 3 - 4)

3 pieces of instant koko noodles (maggie mee)
3 cloves of garlic, minced
1/2 small red onion, diced
5 hotdogs, cut into small chunks
1 1/2 carrots, cut into thin strips
4 imitation crab sticks, cut into small chunks
10 fresh shitake mushroom, sliced
3 eggs
2 tbsp oyster sauce
salt and pepper to taste
3/4 cup hot water


Directions

In a pot of boiling water, add the instant noodles in and cook for a min or less. Do not cook too thorough as you are frying the noodles later. Dish out and set aside.


Heat the frying wok and add some cooking oil. Scrambled the eggs and set aside. 


In the same wok, add some oil and when hot, saute the garlic and onion until fragrant.

Add in the carrots and stir-fry for a min or two. Add the hotdogs and shitake mushrooms and stir evenly. Add  the crab stick and mix evenly the ingredients.

Add the instant noodles, oyster sauce, salt and pepper (to taste) and  water. Stir evenly ensuring the noodles dun stick to the wok. Add more water as and when needed.


Cook the noodles for another 7 mins, stir constantly to prevent the noodles from sticking to wok.

Add the eggs and mix evenly.


Serve with belacan chili.


Tuesday 13 May 2014

Honey Mustard Chicken Burger with Caramelized Onions and Creamy Mushroom


The hub is going overseas for a couple weeks due to work and the elder kid is studying hard for his Science examination, so I wanted to make something special for them to give them some encouragement.

Both of them like a little heat in their burgers and sandwiches. In fact whenever we are in Subway for a meal, the two of them never fail to order their subs with honey mustard sauce and sweet onion sauce. So I decided to bring the flavors to them at home - Honey Mustard Chicken Burger with Caramelized Onions. Then I become greedy and decided, why not also add in creamy mushrooms for the vegetable intake! Haha...

Here's the recipe...


Honey Mustard Chicken Burger with Caramelized Onions (Makes 5-6 burger patties )

To make the patties:

500g minced chicken
1 egg
4 tbsp honey mustard sauce
3/4 cup panko bread crumbs
1 tbsp dried parsley (can also use fresh finely chopped parsley)
1 garlic clove, peeled and finely chopped

For the burger bun:

5-6 burger buns
Caramelized onions
Creamy mushroom
5-6 slices cheddar cheese
Butter to spread
Butter-head lettuce (optional)


Directions

In a mixing bowl, combine all the ingredients for the patties. Using hands or a spoon, mix until well combined.


Take a small portion of the mixture and shape into a patty and set aside. Continue the same until all used up.

In a heated frying pan, add some cooking oil. When the oil is heated, add the patties into the pan. Cook each side approx. 5-7 mins, making sure it is browned before flipping.


Dish up the patties and drain off the oil using a kitchen towel.

Take a buttered burger bun and place one slice of cheese and the creamy mushroom.

Put a patty on top of the bun. Top with caramelized onions and lettuce (if desired).


The hub and son loved the burger. The hub even complained that the caramelized onions not enough! A sinful and filling meal that is simple to do and great in taste!

Tuesday 8 April 2014

Shepherd's Pork Pie


I am a big big fan for Shepherd's Pie, I simply cannot resist the comfort feeling of eating this dish especially if it's on a cold day. You don't get to find this dish easily here in Singapore as not many restaurants do this. I remember there used to be a café that has this dish on it's menu and it's a die-also-must-order for me whenever I visit the café. When the café ceased operation, I was devastated, I lost my source of Shepherd's Pie.

Have been wanting to try making this dish but keep putting off due to my laziness. Recently the urge to give it a try came back and I started researching for recipes. Found a few that looks delicious, mostly beef and lamb and a couple chicken ones. Decided to be a little different and make it into a pork pie instead!


As always, I started doing my own variation by combining some ingredients used in one recipe and some from another. I had also replaced some ingredients with something I have at home (so that I won't have to buy more things to store in my overflowing fridge!). In the end, I came up with a recipe and I am so so glad it turned out fabulous!

The recipe below will make one medium-sized casserole and one small casserole as can be seen in my picture. It was more than enough to feed the 3 of us (my hubby, son & I) For small eaters or if you have a side dish to go with it, it should be sufficient for 4 people.


Here's the recipe...


Shepherd's Pork Pie - Serves 3 - 4

For the filling:

300g minced pork
1/3 yellow onion, chopped finely
10 shitake mushrooms, sliced
1 carrot, cut into small pieces
1/2 cup frozen corn
2 - 3 cloves of garlic, minced
1/2 tbsp. mixed herbs
2 tsp. all-purpose seasoning powder ( I used Master food brand)
2 bay leaves
5 tbsp. pasta sauce (any which is tomato-based will do)
1/4 cup water
1 tbsp. cooking oil
pepper ( to taste)


For the topping:

3 medium potatoes
1/2 cup full-cream milk
25g butter, unsalted
pepper and salt (to taste)
1 egg, beaten lightly (for egg wash)
1/4 cup mozzarella cheese


Directions

Peel and quarter potatoes, boil in salted water until tender. (approx. 20 mins)

While the potatoes are cooking, heat the cooking oil in a large frying pan.

Sauté the onion garlic until tender and fragrant. Add carrots and sauté well.

Add minced pork. Sauté well, making sure the minced pork do not lump into big pieces.

Add corn and mushroom

Add the mixed herbs, pepper and all-purpose seasoning powder and mix well.

Add the pasta sauce, bay leaves and water to simmer over low heat until cook thoroughly. (approx. 10 mins) You might need to add a little more water as necessary to keep it moist.

Turn heat off and dish up the minced pork into the casserole dishes, filling up approx. 3/4 of the dish.

Pre-heat oven to 200 Degree Celsius.

In a large bowl, put the cooked potatoes and mash it thoroughly.

Add butter, milk, salt and pepper to the mash potatoes and mix well. Your mash potatoes will turned out nice and creamy.

Heap the mash potato onto of the minced pork and spread evenly to cover completely.

Brush the beaten egg over the mash potato generously.

Using a fork, rough up the mash potatoes so that there are peaks that will brown nicely.

Sprinkle the mozzarella cheese on top of the mashed potatoes and bake for 20 mins or until golden brown.

Serve hot.


Hope you enjoy the dish as much as me. Bon appetite!

Friday 4 April 2014

Korean Rice Cakes


I had never tried making any Korean dishes but my sister who loves Korean food had made this dish for me once. It was delicious but not really to my son's palate as the ingredients used were not what he likes to eat (my fussy eater....sigh!). So I did not try replicating the dish myself.

However, was grocery shopping the other day and saw the shop selling the rice cakes and the ready-made sauce. So I begin thinking maybe I should try doing the dish and change it to fit my son's preferences.

End results, he was rather happy with the dish but he commented that the rice cakes are quite chewy. (Which is typical of this dish). Well, at least the fussy king ate the whole plate so I am satisfied! Now I have another dish to keep the variety in the menu!

The picture below shows the sauce that I had used. I'm sure there are many other brands out there, but I'm just sharing the one I used.


Here's the recipe...


Korean Rice Cakes Serves 3 - 4

1 packet of Korean Rice Cakes
1 packet Topokki sauce (spicy & sweet sauce)
8 - 10 shitake mushrooms, sliced
1/2 carrot, sliced thinly
4 hotdogs, sliced diagonally
5 imitation crab stick, cut into small pieces
1 - 2 cups water
2 cloves of garlic, minced
1 egg
1 tbsp. cooking oil


Directions

In a large wok or frying pan, heat the oil over medium heat and sauté the garlic until fragrant.

Add carrots and stir-fry for a min.

Add 1 cup of water and the Topokki sauce. Bring to boil.

Add in the Korean Rice Cakes and simmer on low heat until the rice cakes softens. (approx. 10 mins)

Add in the hotdogs, mushrooms and crab sticks. Stir and continue cooking on low heat for another 10 - 15 mins. Add some more water if necessary.

Add egg and turn heat off. Stir the egg in well and let the remaining heat cook the egg.

Serve while hot.


A very easy and fast dish that is so delicious. I hope you will enjoy it as much as I do!

Monday 17 March 2014

Ham & Vegetables Frittata


My son loves ham, mushroom and eggs. In my effort in trying to incorporate more vegetables in his diets (He dislikes vegetables in general!), I am always on a lookout for interesting ways to cook the vegetables. One way which I found online is doing frittatas, improvising it to fit my son's palate.

So what is a frittata?

It is basically like an egg-based Italian dish similar to an omelette or crustless quiche, enriched with an additional ingredients such as meats, cheeses, vegetables and/or pasta.

Here's the recipe...


Ham and Vegetables Frittata - Serves 2 - 4

4 large eggs
2 slices of ham, sliced
3 - 4 shitake mushrooms or fresh button mushroom, sliced
1/4 red onion (can also use yellow onion), chopped finely
1/2 carrot, sliced finely
1/2 cup buttermilk or full cream milk
Cheese of your choice, grated
1 tbsp. butter
2 handful of pasta (of your choice)
4 tbsp. of pasta sauce (tomato-based)
Pepper and salt to taste


Directions

Cook the pasta in a pot of boiling water with a little salt. When cooked, drain the water and wash the pasta with cold water. Drain and set aside.

Heat up frying pan (I'm using the Happycall pan, so must heat both side. Please adjust heat according to your pan) using small to medium heat. When heated up, add butter and onion and fry until fragrant. The onion should look slightly translucent.

Add in the carrots and fry about 2 mins. You can close the pan to sauté for a while so that the carrot can soften. Add in the mushroom and ham. Stir fry for a min.

Add in the pasta and the pasta sauce. Fry for a while, close the pan to simmer.

Meanwhile in a medium bowl, add the eggs, buttermilk, salt and pepper (according to personal taste preference) and beat the eggs to a frothy mixture.

Pour the mixture into the pan and spread it evenly. Close pan to cook the omelete for about 2 – 3 mins, flip the pan and cook the other side for another 1 – 2 mins till brown on both side.

Serve hot with mayo or sour cream (if desired).